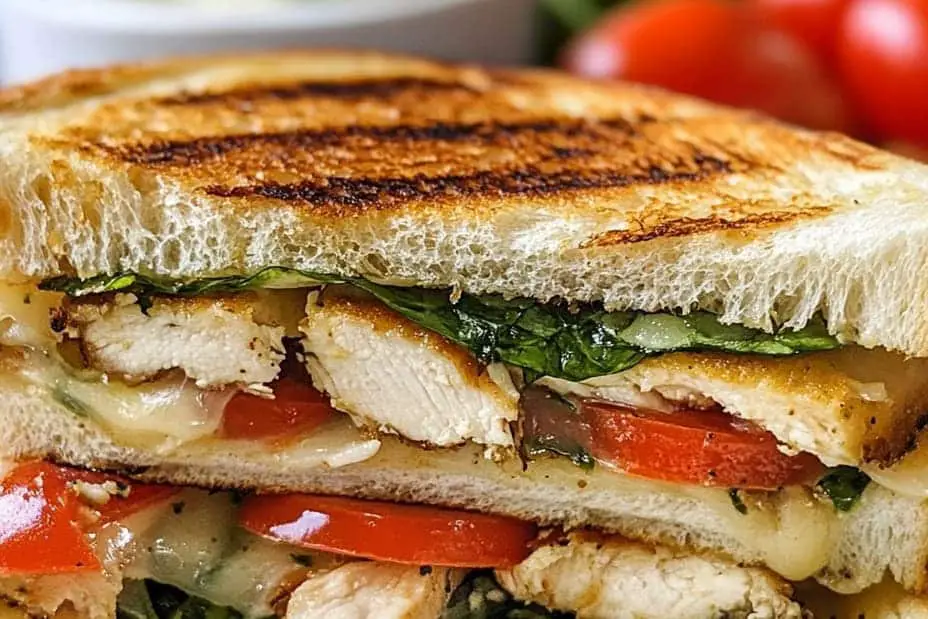
Italian Chicken Panini is a deliciously hearty lunch option that can turn any midday meal into an extraordinary culinary experience. With its crispy bread, juicy chicken, and a medley of savory toppings, a panini captures the essence of Italian cooking in a portable format. Every bite offers a delightful crunch paired with flavors that meld beautifully. A good panini strikes the perfect balance between comforting and exciting, making it a favorite for any lunch enthusiast.
If you’ve been searching for a recipe that pleases the palate and fuels your day, you’ve found it. The golden crust and warm interior of an Italian Chicken Panini will have you eagerly looking forward to lunch. As you savor this delightful treat, you’ll experience a blend of tender chicken, melted cheese, and zesty sauces—perfect for those who appreciate rich flavors. In this article, we will explore why this recipe is so beloved, the preparation and cooking time needed, and detailed steps to help you create this amazing dish from scratch.
Preparing an Italian Chicken Panini is not only a straightforward task, but the results are also wonderfully satisfying. Whether you’re making it for yourself, family, or guests, this panini is guaranteed to impress. Let’s delve into what makes the Italian Chicken Panini a must-try recipe for lunch lovers everywhere!
Why You’ll Love This Recipe
There are countless reasons to love the Italian Chicken Panini. Here are some standout points that will certainly convince you:
1. Quick to Prepare: This recipe requires minimal prep time, making it an ideal weekday lunch option.
2. Versatile Ingredients: You can customize the panini with various toppings and sauces that suit your taste preferences.
3. Hearty and Filling: The combination of chicken, cheese, and bread ensures a satisfying meal that keeps hunger at bay.
4. Easy to Make: The clear steps and simple ingredients make this dish accessible for all skill levels.
5. Great for Leftovers: Any leftover chicken can be effortlessly turned into a delicious panini the next day, reducing food waste.
6. Perfect for Meal Prep: The panini is easy to prepare in advance, so you can grab and go for busy days.
These advantages highlight why so many people rave about the Italian Chicken Panini. Each mouthful strikes a delightful balance of flavors that leaves you craving more!
Preparation and Cooking Time
Making your delightful Italian Chicken Panini will take about 30 to 40 minutes. Here’s a quick outline of the time you need:
– Preparation Time: 15-20 minutes
– Cooking Time: 15-20 minutes
This timeframe can vary depending on your experience in the kitchen and the efficiency of your equipment. Regardless, you’ll find that whipping up these amazing paninis is quite manageable!
Ingredients
– 2 cups cooked chicken, shredded or sliced
– 4 ciabatta rolls or panini bread
– 1 cup mozzarella cheese, shredded
– 1/2 cup roasted red peppers, sliced
– 1/4 cup fresh basil leaves
– 1/4 cup pesto sauce
– Salt and pepper, to taste
– Olive oil, for grilling
Step-by-Step Instructions
Creating an Italian Chicken Panini is simple if you follow these steps:
1. Prepare the Bread: Cut the ciabatta rolls in half horizontally. If using panini bread, just slice it open.
2. Season the Chicken: In a bowl, combine the shredded chicken with salt and pepper to taste. If desired, you can stir in a little pesto for added flavor.
3. Assemble the Panini: On the bottom half of each roll, layer the chicken, mozzarella cheese, roasted red peppers, basil leaves, and a drizzle of pesto.
4. Top it Off: Close the sandwich with the other half of the roll, pressing down gently.
5. Heat the Grill: Preheat a panini press or grill pan over medium heat. Drizzle a bit of olive oil on the grill if using a pan.
6. Grill the Panini: Place the assembled sandwiches on the grill and press down. Cook for about 5-7 minutes or until the bread is golden brown and the cheese is melted.
7. Flip if Necessary: If you’re using a grill pan, flip the panini halfway through cooking to ensure even browning.
8. Resting Time: Once ready, remove the panini from the grill and let it rest for a minute before slicing.
9. Slice and Serve: Cut the panini in half diagonally and serve while warm.
With these steps, your tasty Italian Chicken Panini will be ready to enjoy!
How to Serve
When it comes to serving your Italian Chicken Panini, consider these tips to elevate the experience:
1. Presentation: Arrange the sliced panini on a colorful plate. Adding a small salad or chips on the side creates a delightful meal.
2. Dipping sauces: Serve with extra pesto, marinara, or a balsamic glaze for dipping. This adds an interactive element to your meal.
3. Pairings: Complement the panini with a side of soup, such as minestrone or tomato basil.
4. Beverage Choices: Opt for a refreshing iced tea, soda, or even wine for a more elegant touch.
By taking a moment to present your dish attractively, you’ll create a memorable dining experience that highlights the amazing flavors of the Italian Chicken Panini.
Additional Tips
– Use Fresh Ingredients: The quality of the chicken, cheese, and herbs significantly influences the final taste. Fresh ingredients enhance the overall flavor.
– Experiment with Cheese: While mozzarella is a classic choice, consider using provolone or fontina for a different taste.
– Add Some Spice: For those who enjoy a bit of heat, a sprinkle of crushed red pepper flakes or spicy aioli can add a delightful kick.
– Grill to Perfection: Make sure your grill or panini press is preheated. This helps achieve that perfect, golden crust.
– Consider a Side Salad: A light side salad can complement the richness of the panini and round out the meal beautifully.
Recipe Variation
Feel free to give your Italian Chicken Panini a personalized twist! Here are some suggestions:
1. Mediterranean Style: Swap roasted red peppers with sun-dried tomatoes and add feta cheese for a delightful Mediterranean flair.
2. BBQ Chicken Panini: Use barbecue sauce instead of pesto and add crisp coleslaw for a tangy, smoky version.
3. Veggie Lover’s Panini: Keep it vegetarian by omitting chicken and adding grilled zucchini, spinach, or artichoke hearts.
4. Caprese Style: Layer in fresh mozzarella, tomatoes, and a drizzle of balsamic reduction for a refreshing take.
Freezing and Storage
– Storage: Keep your panini in an airtight container to maintain freshness for up to two days in the refrigerator.
– Freezing: You can freeze assembled, ungrilled paninis wrapped in foil or plastic. They can last up to three months. Just ensure to grill them directly from the freezer when ready.
Special Equipment
To create an amazing Italian Chicken Panini, you’ll need some specific tools:
– Panini press or grill pan
– Cooking spatula
– Sharp knife for slicing
– Mixing bowl for seasoning chicken
– Brush for oiling the grill
Frequently Asked Questions
Can I use raw chicken for this recipe?
It is best to use cooked chicken for safety and to save time. If you’d prefer, you can grill or bake the chicken first before assembling the panini.
How can I make this recipe gluten-free?
To make a gluten-free version, simply swap out the ciabatta rolls or bread for a gluten-free alternative available in stores.
What other sides can I serve with the panini?
Some great side options include sweet potato fries, chips, or a warm bowl of soup. They all pair wonderfully!
Can I toast the panini in a frying pan?
Absolutely! Just use a bit of olive oil in the pan and press down with a heavy skillet to achieve that delicious grill mark.
How do I prevent the panini from becoming soggy?
Ensure your ingredients, particularly sauces and veggies, are well-drained. Moisture can make the bread soggy if not managed properly.
Conclusion
The Italian Chicken Panini is not just a meal; it’s an experience that brings together flavors, textures, and creativity. Its versatility allows for multiple variations to suit anyone’s preference, making it a favorite for lunch enthusiasts everywhere. Preparing this hearty sandwich doesn’t only satisfy your hunger but also uplifts your culinary spirit. So grab your ingredients and start grilling; you won’t regret this deliciously hearty lunch option!

Italian Chicken Panini: An Amazing Ultimate Lunch Recipe
- Total Time: 35 minutes
Ingredients
– 2 cups cooked chicken, shredded or sliced
– 4 ciabatta rolls or panini bread
– 1 cup mozzarella cheese, shredded
– 1/2 cup roasted red peppers, sliced
– 1/4 cup fresh basil leaves
– 1/4 cup pesto sauce
– Salt and pepper, to taste
– Olive oil, for grilling
Instructions
Creating an Italian Chicken Panini is simple if you follow these steps:
1. Prepare the Bread: Cut the ciabatta rolls in half horizontally. If using panini bread, just slice it open.
2. Season the Chicken: In a bowl, combine the shredded chicken with salt and pepper to taste. If desired, you can stir in a little pesto for added flavor.
3. Assemble the Panini: On the bottom half of each roll, layer the chicken, mozzarella cheese, roasted red peppers, basil leaves, and a drizzle of pesto.
4. Top it Off: Close the sandwich with the other half of the roll, pressing down gently.
5. Heat the Grill: Preheat a panini press or grill pan over medium heat. Drizzle a bit of olive oil on the grill if using a pan.
6. Grill the Panini: Place the assembled sandwiches on the grill and press down. Cook for about 5-7 minutes or until the bread is golden brown and the cheese is melted.
7. Flip if Necessary: If you’re using a grill pan, flip the panini halfway through cooking to ensure even browning.
8. Resting Time: Once ready, remove the panini from the grill and let it rest for a minute before slicing.
9. Slice and Serve: Cut the panini in half diagonally and serve while warm.
With these steps, your tasty Italian Chicken Panini will be ready to enjoy!
- Prep Time: 15 minutes
- Cook Time: 20 minutes
Nutrition
- Serving Size: 4
- Calories: 450 kcal
- Fat: 18g
- Protein: 30g