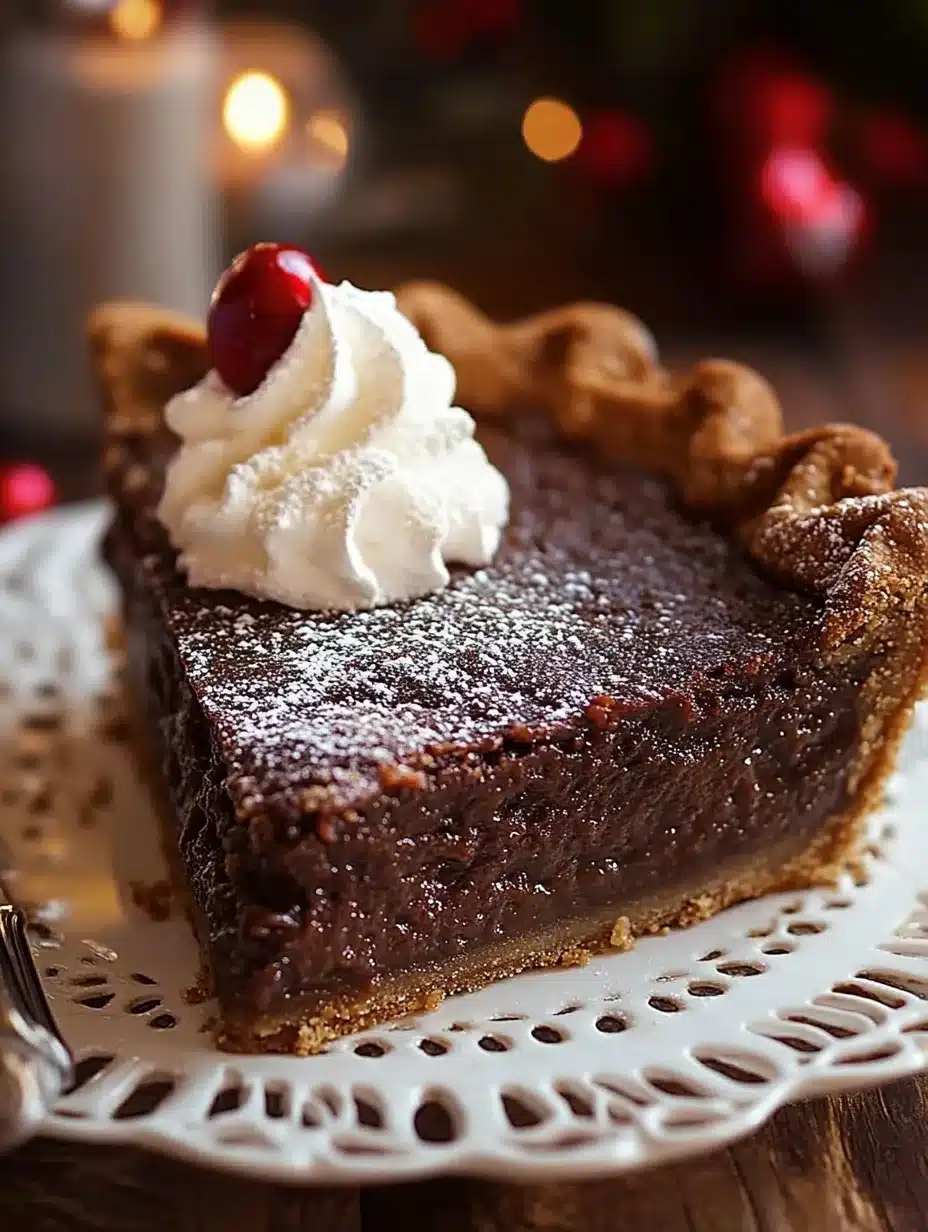
Minny’s Chocolate Pie is a dessert that transcends ordinary chocolate treats. Rich, creamy, and utterly indulgent, this pie promises an experience like no other. Inspired by the beloved character from “The Help,” it embodies the essence of home cooking, comfort food, and a touch of soul. Whether you’re celebrating a special occasion or simply indulging yourself, this chocolate pie is sure to please anyone who takes a slice.
This delightful dessert encapsulates the perfect balance of sweetness and chocolate richness. The velvety filling made with real chocolate and topped off with fresh whipped cream is a combination that invites you to dive right in. It’s a nostalgic dish that evokes memories of family gatherings around the dining table.
In this guide, we will explore why Minny’s Chocolate Pie is a recipe you’ll want to keep on hand, how to prepare it from scratch, and tips on serving it beautifully. Whether you are a novice cook or a seasoned baker, the incredible flavors and delightful texture of this pie will surely impress everyone at your table.
Why You’ll Love This Recipe
Minny’s Chocolate Pie is not just any chocolate dessert; it’s an entire experience. Here are some irresistible reasons why you will love this recipe:
1. Decadent Flavor: Each bite offers a rich chocolate experience that is incredibly satisfying.
2. Easy to Make: With simple steps, you’ll find this pie is easier to prepare than you might think.
3. Perfect for Any Occasion: Serve it at parties, holidays, or just as a treat for yourself.
4. Crowd-Pleaser: This pie is sure to impress your friends and family, making it a perfect dessert for gatherings.
5. Customizable: You can add your own twist, whether it’s extra toppings or a unique crust.
6. Classic Comfort Food: This recipe brings warmth and happiness, making it perfect for cozy nights in.
With these delightful features, it’s easy to see why Minny’s Chocolate Pie is an all-time favorite!
Preparation and Cooking Time
Preparing Minny’s Chocolate Pie will have you in and out of the kitchen in no time. Here’s a breakdown of the time needed:
– Preparation Time: 20 minutes
– Cooking Time: 30 minutes
– Cooling Time: 2 hours
– Total Time: Approximately 2 hours and 50 minutes
These times may vary slightly based on your cooking experience, but this timeline gives you a good estimate.
Ingredients
To create Minny’s Chocolate Pie, you’ll need the following ingredients:
– 1 pre-made pie crust (9-inch)
– 1 cup granulated sugar
– 2/3 cup unsweetened cocoa powder
– 1/4 cup cornstarch
– 1/4 teaspoon salt
– 2 3/4 cups whole milk
– 1/2 cup unsalted butter, cut into pieces
– 2 teaspoons vanilla extract
– 3 large egg yolks, beaten
– Whipped cream, for topping (optional)
– Chocolate shavings, for garnish (optional)
Step-by-Step Instructions
Creating Minny’s Chocolate Pie is a straightforward process. Follow these steps to achieve the perfect pie:
1. Preheat the Oven: Preheat your oven to 350°F (175°C).
2. Prepare the Pie Crust: Place the pre-made pie crust into a 9-inch pie plate. Prick the bottom with a fork to prevent bubbles.
3. Bake the Crust: Bake the crust for 10 minutes, then remove it from the oven and let it cool completely.
4. Mix Dry Ingredients: In a medium saucepan, whisk together the sugar, cocoa powder, cornstarch, and salt until well combined.
5. Add Milk: Gradually whisk in the milk until smooth and blended.
6. Cook the Mixture: Place the saucepan over medium heat. Stir constantly until the mixture thickens and starts to bubble.
7. Combine Egg Yolks: In a small bowl, whisk the egg yolks. Take a small amount of the hot chocolate mixture and gradually stir it into the egg yolks to temper them.
8. Complete the Filling: Pour the tempered egg yolks back into the saucepan with the chocolate mixture. Continue to cook while stirring for an additional 2 minutes.
9. Add Butter and Vanilla: Remove from heat. Stir in the butter and vanilla extract until fully melted and incorporated.
10. Pour into Crust: Pour the chocolate filling into the cooled pie crust, smoothing the top with a spatula.
11. Chill: Cover the pie with plastic wrap and refrigerate for at least 2 hours to allow it to set fully.
12. Serve with Whipped Cream: Once chilled, serve slices topped with fresh whipped cream and chocolate shavings if desired.
These steps are simple yet effective in creating this mouth-watering dessert.
How to Serve
Serving Minny’s Chocolate Pie is as essential as making it. Here are some tips for presenting this delectable pie:
1. Garnish: Add a dollop of whipped cream on each slice for an elegant touch. Chocolate shavings or sprinkles can also enhance the visual appeal.
2. Plating: Use a beautiful pie plate and serve each slice on a decorative dessert plate for an inviting presentation.
3. Pair with Beverages: This pie pairs beautifully with coffee, a glass of milk, or dessert wine, enriching the dining experience.
4. Serving Temperature: While deliciously chilled, you can let the pie sit at room temperature for about 15 minutes before serving for a softer texture.
By putting thought into the presentation, you’ll create an unforgettable experience for your guests and yourself. Enjoy the chocolatey goodness and the smiles it brings!
In conclusion, Minny’s Chocolate Pie is not merely a dessert; it’s a testament to the power of home-cooked comfort food. The amazing flavor, easy preparation, and wonderful presentation make it a must-try recipe for anyone who loves chocolate. Whether for a special gathering or a cozy night at home, this pie will not disappoint.
Additional Tips
– Use High-Quality Ingredients: The flavor of Minny’s Chocolate Pie significantly relies on the quality of your ingredients. Opt for fresh eggs, rich cocoa powder, and real butter for an unparalleled taste.
– Temper the Egg Yolks Carefully: When combining the hot mixture with the egg yolks, do so slowly to avoid scrambling. This step is crucial for achieving a smooth filling.
– Chill the Pie Longer: For optimal texture, don’t rush the cooling process. Letting the pie rest in the fridge longer will help it set perfectly.
– Presentation: Consider adding a sprinkle of sea salt on top of the whipped cream for a delightful contrast to the sweetness of the pie.
Recipe Variation
Experimenting with different variations can add a personal touch to Minny’s Chocolate Pie. Here are some ideas to consider:
1. Peanut Butter Swirl: Incorporate swirls of creamy peanut butter into the chocolate filling before chilling for a delicious twist.
2. Mint Chocolate Variation: Add a few drops of mint extract to the filling for a refreshing mint chocolate flavor.
3. Nutty Crunch: Fold in crushed nuts, such as walnuts or pecans, into the filling for added texture and flavor.
4. Alternative Crust: Instead of using a traditional pie crust, try a cookie crust made from crushed Oreos or graham crackers.
Freezing and Storage
Proper storage will maintain the freshness of your Minny’s Chocolate Pie:
– Refrigeration: Store the pie covered with plastic wrap or in an airtight container. It will keep well in the fridge for up to 5 days.
– Freezing: If you plan to make it in advance, you can freeze slices of the pie. Wrap them tightly in plastic wrap and then foil, ensuring they are well-protected. The pie can be frozen for up to 3 months. To serve, thaw in the refrigerator overnight.
Special Equipment
A few essential tools will make preparing Minny’s Chocolate Pie easier and more efficient:
– Medium saucepan for cooking the filling
– Whisk for mixing ingredients smoothly
– Measuring cups and spoons for accuracy
– Pie dish to hold the crust and filling
– Rubber spatula for pouring and smoothing the filling
Frequently Asked Questions
What can I use instead of a pre-made pie crust?
You can make a homemade pie crust using flour, butter, sugar, and water if you prefer a fresh approach.
Can I use dark chocolate instead of cocoa powder?
Absolutely! For a richer flavor, you can substitute unsweetened cocoa powder with dark chocolate. Just melt it down and adjust the milk accordingly.
How should I store leftovers?
Keep any leftovers in the refrigerator, covered. It will stay fresh for several days.
Can I make this pie gluten-free?
Yes, you can use a gluten-free pie crust to cater to gluten-free diets, ensuring your guests can enjoy this delectable dessert.
What to do if the filling doesn’t thicken?
If your filling isn’t thickening as expected, it might need more time on the heat. Stir constantly until it reaches the desired consistency, making sure it bubbles slightly.
Conclusion
Minny’s Chocolate Pie is more than just a dessert; it’s an invitation to indulge in rich, creamy chocolate goodness. With its layered textures and flavors, this pie stands as a loving tribute to comfort food. Whether for a special celebration or a cozy evening, this pie is bound to impress and satisfy. Try making it today, and treat yourself and loved ones to a slice of pure happiness.

Minny’s Chocolate Pie: An Amazing Ultimate Recipe You Must Try
- Total Time: 45 minutes
Ingredients
To create Minny’s Chocolate Pie, you’ll need the following ingredients:
– 1 pre-made pie crust (9-inch)
– 1 cup granulated sugar
– 2/3 cup unsweetened cocoa powder
– 1/4 cup cornstarch
– 1/4 teaspoon salt
– 2 3/4 cups whole milk
– 1/2 cup unsalted butter, cut into pieces
– 2 teaspoons vanilla extract
– 3 large egg yolks, beaten
– Whipped cream, for topping (optional)
– Chocolate shavings, for garnish (optional)
Instructions
Creating Minny’s Chocolate Pie is a straightforward process. Follow these steps to achieve the perfect pie:
1. Preheat the Oven: Preheat your oven to 350°F (175°C).
2. Prepare the Pie Crust: Place the pre-made pie crust into a 9-inch pie plate. Prick the bottom with a fork to prevent bubbles.
3. Bake the Crust: Bake the crust for 10 minutes, then remove it from the oven and let it cool completely.
4. Mix Dry Ingredients: In a medium saucepan, whisk together the sugar, cocoa powder, cornstarch, and salt until well combined.
5. Add Milk: Gradually whisk in the milk until smooth and blended.
6. Cook the Mixture: Place the saucepan over medium heat. Stir constantly until the mixture thickens and starts to bubble.
7. Combine Egg Yolks: In a small bowl, whisk the egg yolks. Take a small amount of the hot chocolate mixture and gradually stir it into the egg yolks to temper them.
8. Complete the Filling: Pour the tempered egg yolks back into the saucepan with the chocolate mixture. Continue to cook while stirring for an additional 2 minutes.
9. Add Butter and Vanilla: Remove from heat. Stir in the butter and vanilla extract until fully melted and incorporated.
10. Pour into Crust: Pour the chocolate filling into the cooled pie crust, smoothing the top with a spatula.
11. Chill: Cover the pie with plastic wrap and refrigerate for at least 2 hours to allow it to set fully.
12. Serve with Whipped Cream: Once chilled, serve slices topped with fresh whipped cream and chocolate shavings if desired.
These steps are simple yet effective in creating this mouth-watering dessert.
- Prep Time: 15 minutes
- Cook Time: 30 minutes
Nutrition
- Serving Size: 8 slices
- Calories: 320 kcal per slice
- Fat: 17g
- Protein: 3g