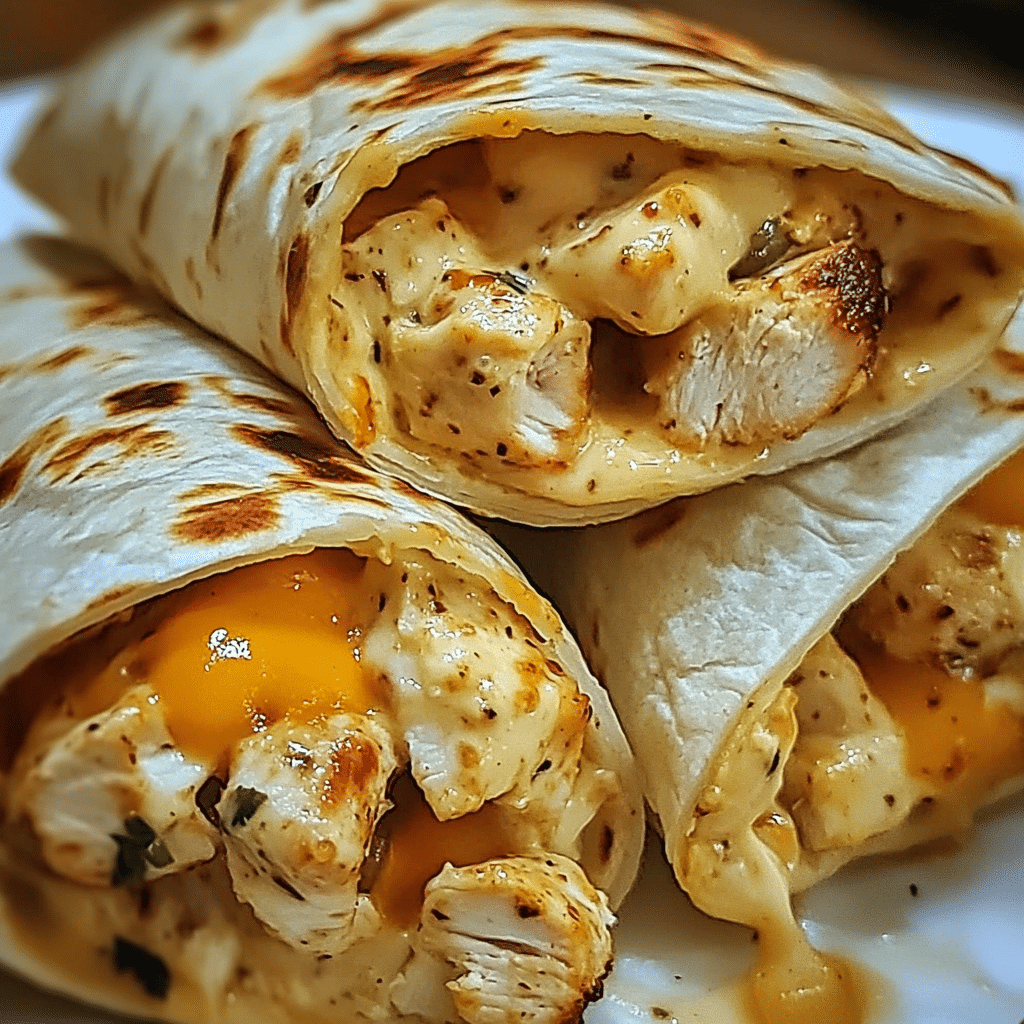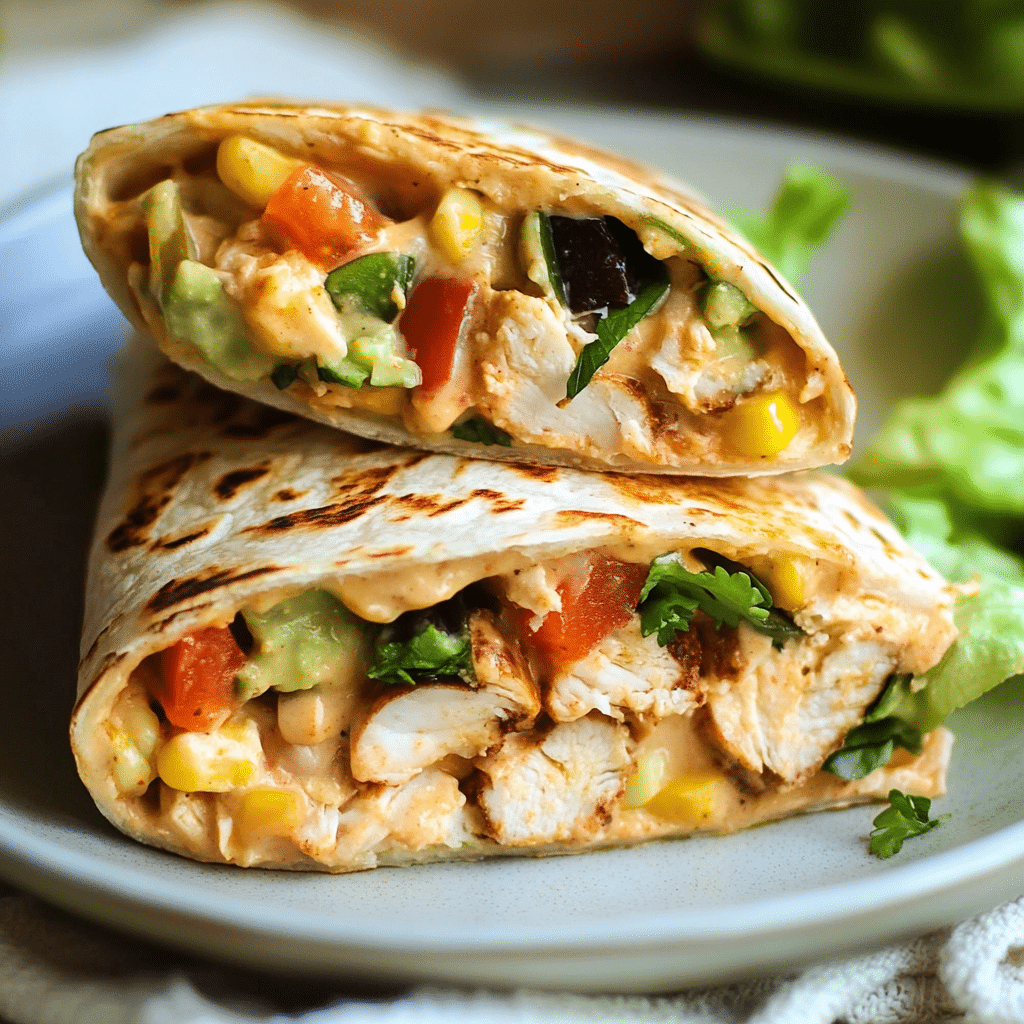

Sticky Chicken Finger Wraps are a deliciously tangy treat that will transform your mealtime into a flavor adventure. These wraps blend crispy, flavorful chicken fingers with fresh vegetables and a mouthwatering sauce, all wrapped up in a soft tortilla. The best part? They are incredibly easy to prepare, making them a fantastic option for lunch, dinner, or even a party snack. Once you take a bite, you’ll understand why this dish has become a favorite among families and friends alike.
Imagine savoring the delightful combination of crispy chicken, fresh veggies, and zesty sauce all in one bite. It’s an amazing way to satisfy your cravings while keeping things fun and casual. The blend of flavors and textures makes Sticky Chicken Finger Wraps not just a meal but an experience. Perfect for busy weeknights or as game-day fare, these wraps are sure to impress. In this guide, we will explore why you’ll love this recipe, how to prepare it, and tips on serving these flavorful wraps to elevate your dining experience.
So, whether you are a seasoned cook or a kitchen novice, Sticky Chicken Finger Wraps offer an easy and satisfying way to enjoy a delicious meal. Let’s dive into what makes this recipe a must-try, and soon you’ll be on your way to preparing these incredible wraps for your next gathering or family dinner.
Why You’ll Love This Recipe
Sticky Chicken Finger Wraps bring together unique flavors and textures that create a standout meal. Here are some reasons why you’ll fall in love with this recipe:
1. Quick Preparation: You don’t need a lot of time to whip up these flavorful wraps. Ideal for busy days, they can be made in under 30 minutes.
2. Customizable: You can easily adjust the ingredients based on personal preferences. Whether you want spicier chicken or extra veggies, the option is yours.
3. Family-Friendly: Kids and adults alike will enjoy this meal. It’s a fun way to include everyone’s favorite finger foods in one delicious wrap.
4. Perfect for Leftovers: If you have any wraps left over, they make great leftovers. You can even pack them for lunch the next day!
5. Great for Meal Prep: You can prepare the components in advance, making it easy to assemble and enjoy throughout the week.
6. Impressive Presentation: When served, these wraps look vibrant and appealing, making them perfect for hosting or casual gatherings.
With these features in mind, it’s easy to see why Sticky Chicken Finger Wraps have become a popular recipe to try. Each bite is sure to satisfy your taste buds with its amazing blend of taste and texture!
Preparation and Cooking Time
Making Sticky Chicken Finger Wraps is fast and straightforward. Here’s a breakdown of the time required:
– Preparation Time: 10 minutes
– Cooking Time: 15 minutes
– Total Time: 25 minutes
With these quick timings, you’ll find it effortless to indulge in this tasty dish anytime.
Ingredients
– 1 pound chicken tenders
– 1 cup all-purpose flour
– 2 large eggs
– 1 cup breadcrumbs (regular or panko)
– 1 teaspoon garlic powder
– 1 teaspoon onion powder
– 1 teaspoon paprika
– ½ teaspoon salt
– ½ teaspoon black pepper
– ½ cup honey
– ¼ cup soy sauce
– 2 tablespoons ketchup
– 1 tablespoon apple cider vinegar
– 4 large tortillas (flour or corn)
– 1 cup shredded lettuce
– 1 cup diced tomatoes
– ½ cup shredded cheese (cheddar or mozzarella)
– Optional: sliced jalapeños, avocado, or other preferred toppings
Step-by-Step Instructions
Creating Sticky Chicken Finger Wraps is simple when you follow these easy steps:
1. Preheat the Oven: Preheat your oven to 400°F (200°C).
2. Prepare the Chicken: In a bowl, season the chicken tenders with salt, pepper, garlic powder, onion powder, and paprika.
3. Dredge the Chicken: Set up three bowls: one with flour, one with lightly beaten eggs, and one with breadcrumbs. Dip each chicken tender into the flour, shaking off the excess, then dip into the egg, and finally coat with breadcrumbs.
4. Place on Baking Sheet: Arrange the coated chicken tenders on a baking sheet lined with parchment paper. Spray lightly with cooking spray for extra crispiness.
5. Bake the Chicken: Bake in the preheated oven for 15-20 minutes or until golden brown and cooked through, turning halfway through cooking.
6. Make the Sauce: In a small saucepan, combine honey, soy sauce, ketchup, and apple cider vinegar. Heat over medium heat until warm and slightly thickened. Stir often to prevent burning.
7. Coat the Chicken: Once the chicken is done baking, drizzle the honey-soy sauce over the chicken tenders, ensuring they are well-coated.
8. Assemble the Wraps: Lay a tortilla flat and place a few chicken tenders in the center. Top with shredded lettuce, diced tomatoes, and cheese.
9. Wrap it Up: Fold in the sides of the tortilla, then roll it from the bottom upwards to secure the filling.
10. Serve Hot: Cut the wraps in half and serve immediately while the chicken is still warm.
How to Serve
To elevate your serving of Sticky Chicken Finger Wraps, consider the following tips:
1. Presentation: Use a colorful plate or a wooden board to display the wraps, making them visually appealing.
2. Dipping Sauce: Offer an extra side of the honey-soy sauce for dipping. This adds an extra layer of flavor that everyone will love.
3. Side Dishes: Consider serving alongside crispy French fries, a light salad, or potato wedges for a complete meal.
4. Beverage Pairing: Pair with refreshing drinks like iced tea or lemonade to complement the flavors of the wraps.
5. Garnish: Add fresh herbs like cilantro or parsley on top for an extra pop of color and flavor.
By taking a little time to present your Sticky Chicken Finger Wraps thoughtfully, you will enhance the entire dining experience for you and your guests. These steps ensure that not only do they taste amazing, but they also look incredible on the plate!
With these simple steps and delicious ingredients, your next meal of Sticky Chicken Finger Wraps will undoubtedly be a hit! Enjoy the delightful combination of flavors and textures with every bite.
Additional Tips
– Enhance Flavor with Marinades: Consider marinating the chicken tenders for at least 30 minutes in a mix of the soy sauce and honey for even more depth of flavor.
– Experiment with Spices: Add a pinch of cayenne pepper or chili powder to the breadcrumbs for a spicy kick.
– Freshness Matters: Use fresh vegetables to elevate the crunch and taste. Crunchy bell peppers or shredded carrots can be excellent choices.
– Wrap Tightly: Ensure the tortillas are wrapped tightly but not overly so, preventing the ingredients from spilling out.
– Make it a Meal: Serve the wraps with a side of sweet potato fries or a simple coleslaw to round out the meal.
Recipe Variation
Feel free to mix and match ingredients to create your perfect wrap! Here are some tasty variations to inspire you:
1. Buffalo Chicken Variation: Swap out the honey-soy sauce for buffalo sauce to give your wraps a tangy and spicy twist.
2. Veggie Lovers Wrap: For a vegetarian option, replace the chicken tenders with crispy cauliflower or chickpea patties.
3. Mediterranean Flair: Use tzatziki sauce instead of honey-soy sauce and add ingredients like cucumber, olives, and feta cheese to enhance the Mediterranean flavor profile.
4. Barbecue Chicken Wrap: Substitute barbecue sauce for the honey-soy sauce and add grilled corn and black beans for extra texture.
Freezing and Storage
– Storage: Store any leftover Sticky Chicken Finger Wraps in an airtight container in the refrigerator. They should be consumed within 2-3 days for optimal freshness.
– Freezing: If you want to freeze them, wrap each assembled wrap in plastic wrap and then in aluminum foil. They can be stored in the freezer for up to 3 months. To reheat, remove the wraps from the freezer and let them thaw in the refrigerator overnight before warming them in the oven.
Special Equipment
To make your cooking experience smooth and efficient, here’s a list of essential equipment you might need:
– Baking Sheet: For baking the chicken tenders evenly.
– Parchment Paper: To line the baking sheet and prevent sticking.
– Mixing Bowls: For preparing the chicken coating and sauces.
– Saucepan: To warm the honey-soy sauce mixture.
– Tortilla Warmer or Clean Kitchen Towel: To keep the tortillas pliable while assembling wraps.
Frequently Asked Questions
Can I use chicken breast instead of chicken tenders?
Yes, chicken breast can be used. Just cut them into strips similar in size to chicken tenders.
What if I don’t have tortillas?
You could use lettuce leaves for a low-carb option or pita bread as an alternative to tortillas.
How do I make the wraps gluten-free?
To make it gluten-free, use gluten-free flour and breadcrumbs, ensuring your tortillas are also gluten-free.
Can I grill the chicken instead of baking?
Absolutely! Grilling will give the chicken a wonderful smoky flavor, enhancing the overall taste of the wraps.
Are these wraps suitable for meal prep?
Yes, all components can be prepped ahead of time, making assembly quick and easy during the week.
Conclusion
Sticky Chicken Finger Wraps are a flavorful and versatile dish that’s perfect for any occasion. Their combination of crispy chicken, fresh veggies, and zesty sauce wrapped in soft tortillas makes for an unforgettable meal. Whether you’re hosting a party, enjoying a family dinner, or prepping for a busy week, these wraps will bring joy and satisfaction. The ease of preparation paired with endless customization options ensures they remain a favorite in your recipe repertoire!

Sticky Chicken Finger Wraps: An Incredible Ultimate Treat
- Total Time: 35 minutes
Ingredients
– 1 pound chicken tenders
– 1 cup all-purpose flour
– 2 large eggs
– 1 cup breadcrumbs (regular or panko)
– 1 teaspoon garlic powder
– 1 teaspoon onion powder
– 1 teaspoon paprika
– ½ teaspoon salt
– ½ teaspoon black pepper
– ½ cup honey
– ¼ cup soy sauce
– 2 tablespoons ketchup
– 1 tablespoon apple cider vinegar
– 4 large tortillas (flour or corn)
– 1 cup shredded lettuce
– 1 cup diced tomatoes
– ½ cup shredded cheese (cheddar or mozzarella)
– Optional: sliced jalapeños, avocado, or other preferred toppings
Instructions
Creating Sticky Chicken Finger Wraps is simple when you follow these easy steps:
1. Preheat the Oven: Preheat your oven to 400°F (200°C).
2. Prepare the Chicken: In a bowl, season the chicken tenders with salt, pepper, garlic powder, onion powder, and paprika.
3. Dredge the Chicken: Set up three bowls: one with flour, one with lightly beaten eggs, and one with breadcrumbs. Dip each chicken tender into the flour, shaking off the excess, then dip into the egg, and finally coat with breadcrumbs.
4. Place on Baking Sheet: Arrange the coated chicken tenders on a baking sheet lined with parchment paper. Spray lightly with cooking spray for extra crispiness.
5. Bake the Chicken: Bake in the preheated oven for 15-20 minutes or until golden brown and cooked through, turning halfway through cooking.
6. Make the Sauce: In a small saucepan, combine honey, soy sauce, ketchup, and apple cider vinegar. Heat over medium heat until warm and slightly thickened. Stir often to prevent burning.
7. Coat the Chicken: Once the chicken is done baking, drizzle the honey-soy sauce over the chicken tenders, ensuring they are well-coated.
8. Assemble the Wraps: Lay a tortilla flat and place a few chicken tenders in the center. Top with shredded lettuce, diced tomatoes, and cheese.
9. Wrap it Up: Fold in the sides of the tortilla, then roll it from the bottom upwards to secure the filling.
10. Serve Hot: Cut the wraps in half and serve immediately while the chicken is still warm.
- Prep Time: 15 minutes
- Cook Time: 20 minutes
Nutrition
- Serving Size: 4 wraps
- Calories: 520 kcal
- Fat: 25g
- Protein: 28g